How to Create a ZSH Find and Preview Command Line Widget
Like most devs, I like living in the terminal for quick operations (git-ops, quick-edits, moving files around, etc.).
Some of my most used CLI tools, in no particular order, are:
- git - The most widely used SCM tool, “not owned” in any way by GitHub.
- Zsh - The Z Shell, with starship prompt.
- fzf - One of the most popular command-line fuzzy finders.
- Unix Commands - like
alias,cat,grep, and more like these.
… and many more tools and utilities, preserved in my dotfiles.
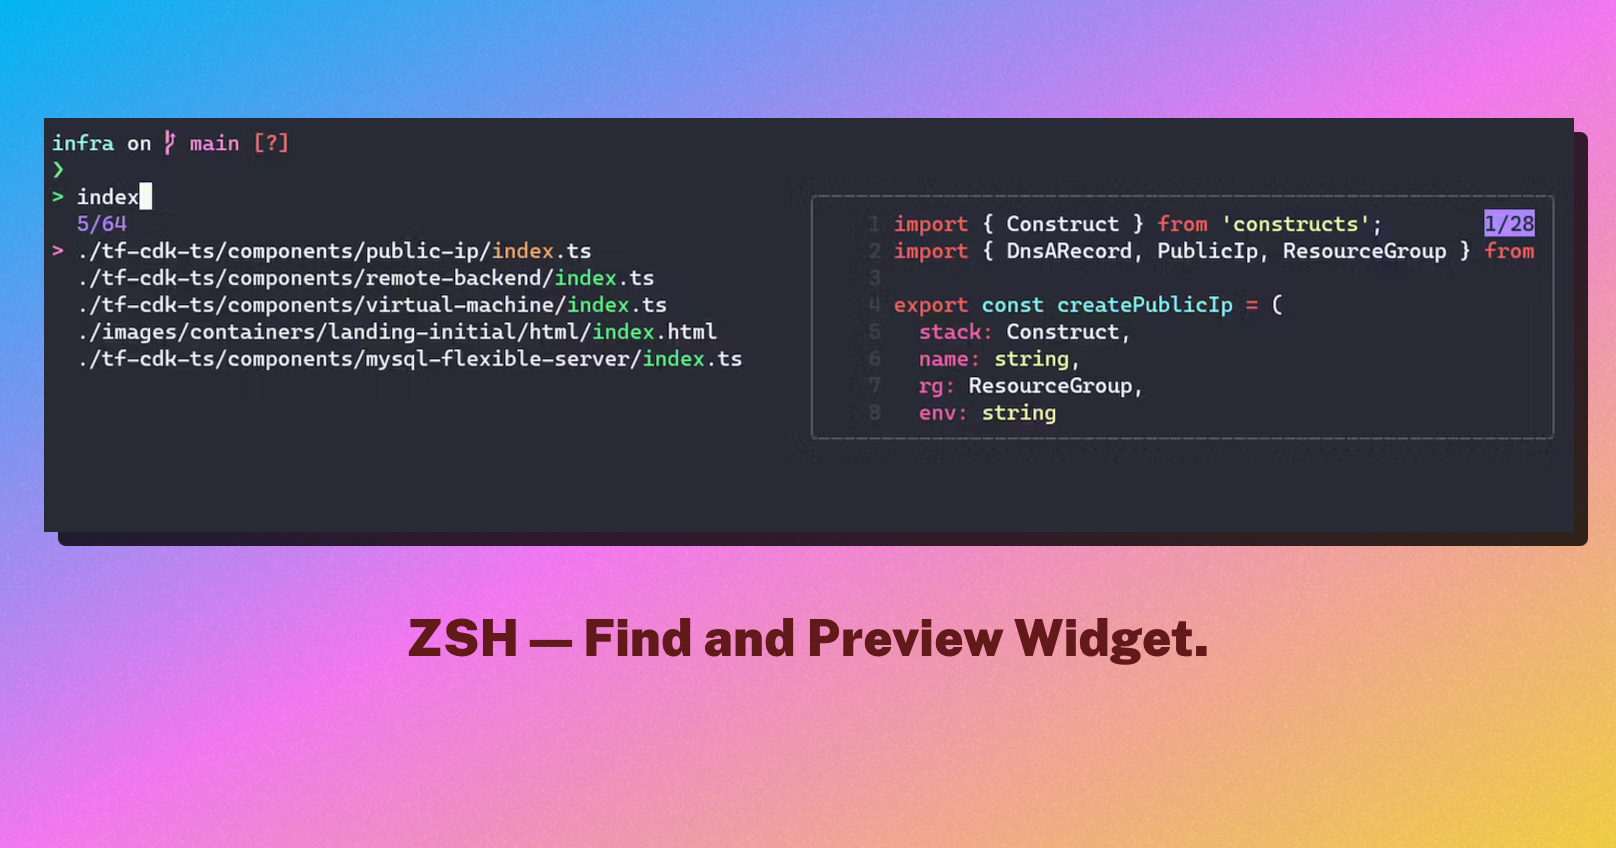
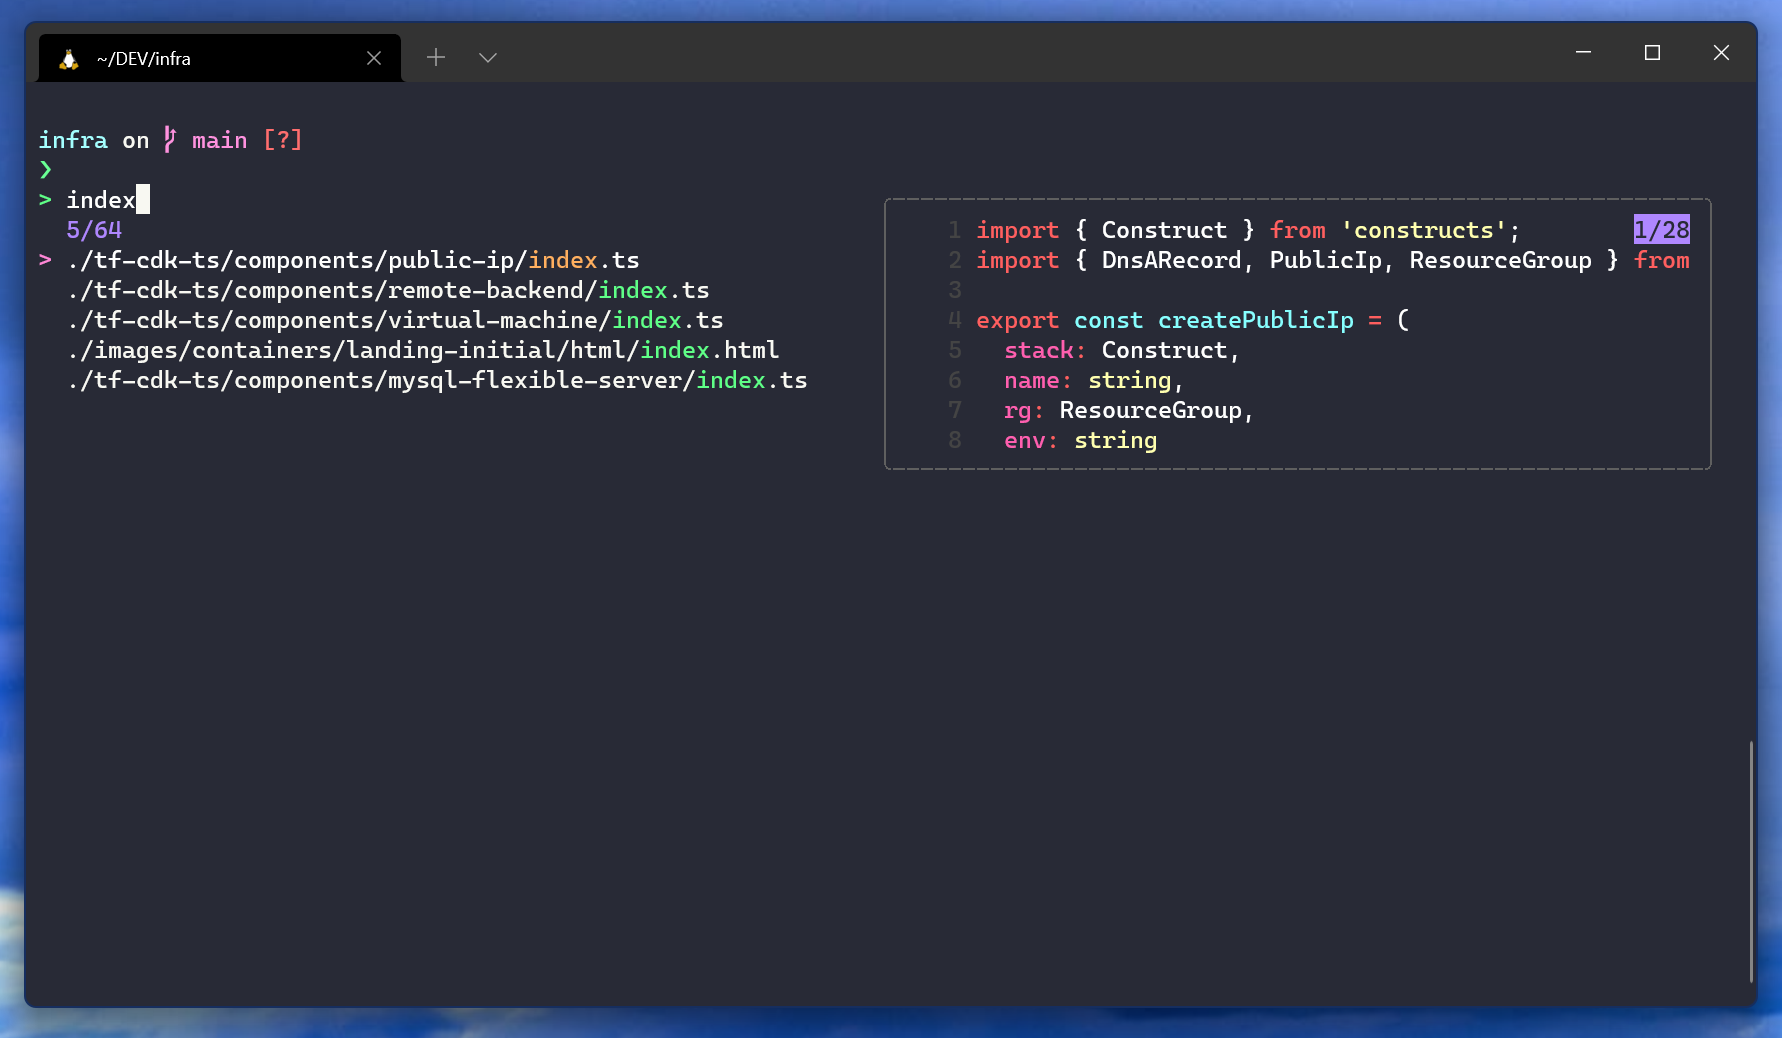
Today, I want to show you how you can create a quick find and edit widget like the one shown below:
Widget with a preview window on the side:
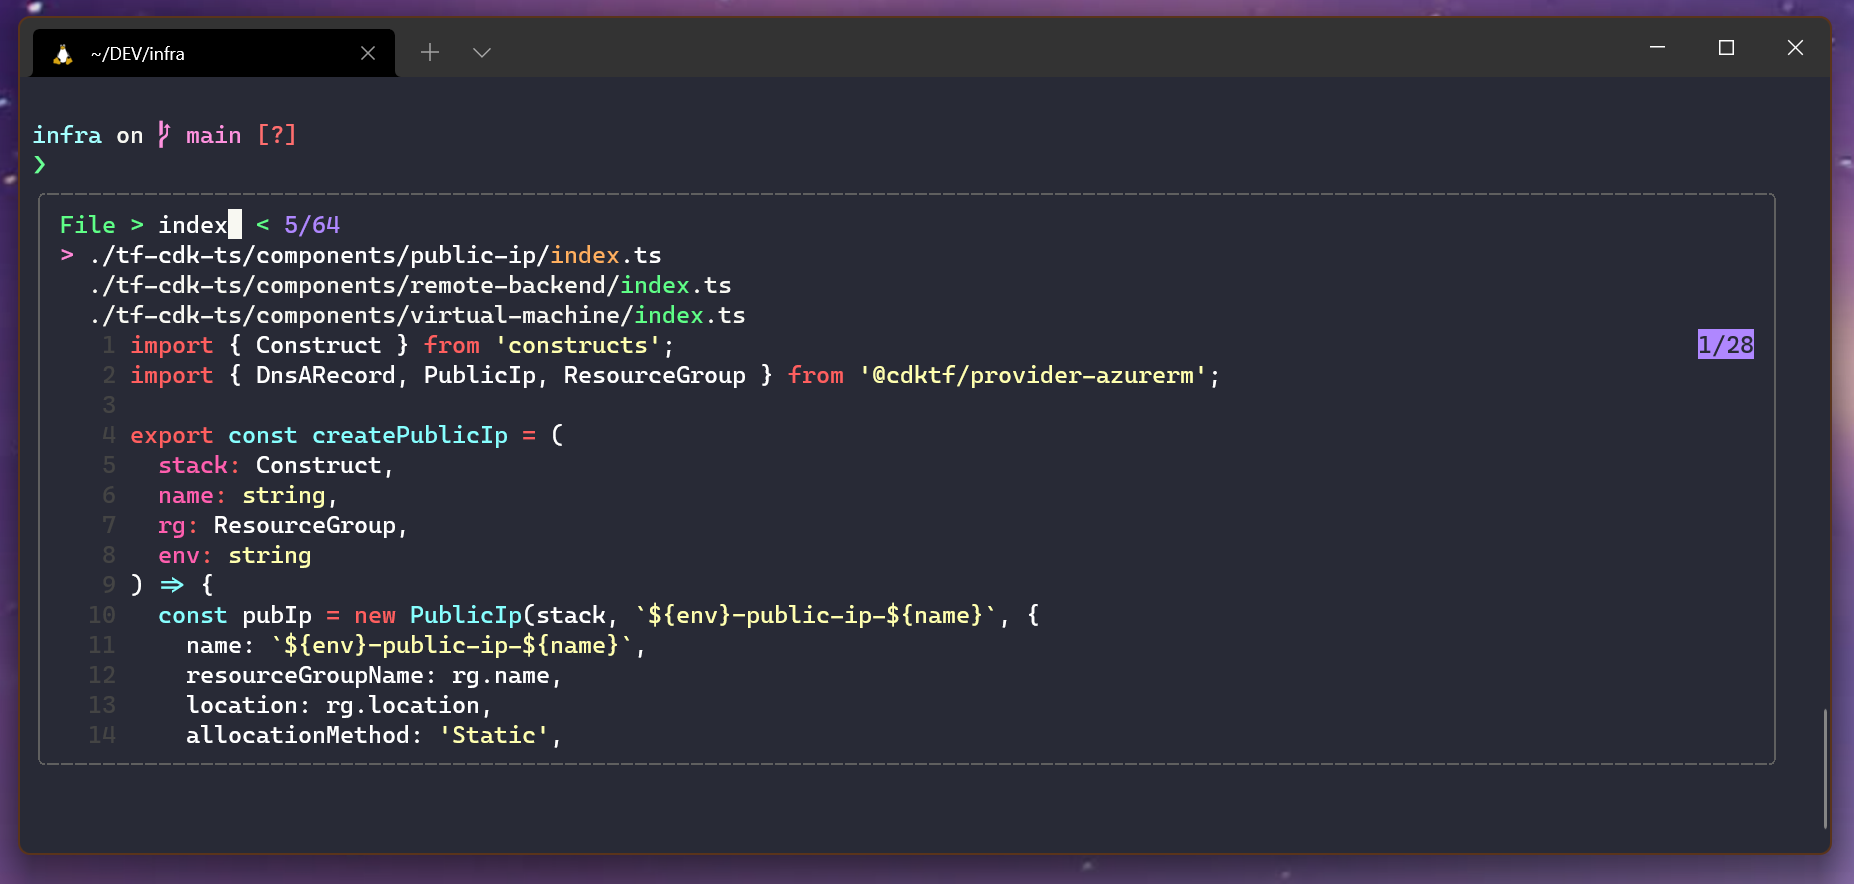
Widget with a preview window on the bottom
As a bonus, you can trigger the widget with Ctrl+P shortcut keys similar to text editors like vs-code.
OK — here is how you can get this:
Firstly, we assume you are on Zsh; if not, these widgets will not work with the code I shared below. So, with that clarified, let’s move to the setup.
Install these pre-requisites:
fzf- Command-line fuzzy finder: https://github.com/junegunn/fzffd- Very fast alternative tofindcommand: https://github.com/sharkdp/fd
Next, you want to add the below in a location you can source with your zsh configuration. I typically create a ~/.bin/functions.sh, which I source in my ~/.zshrc.
Here is the complete snippet, which I will break down in a bit:
%[https://gist.github.com/raisedadead/01668ca97aa1cb2c077fb6b6d2097e53]
Once you have set it up correctly, you can press Ctrl+P or Ctrl+O in a directory of your choice to start looking up the file you want, which will open in the vi editor.
Here the exciting bits are:
- Making
fdtraverse the directory structure, ignoring things like.git.fd --type f --hidden --follow --exclude .git - Creating a couple of functions with custom
fzfstyling and configuration. For example, for a layout that opens below your input cursor, we can do the below:fzf --height 80% \ --layout reverse \ --info inline \ --border \ --preview "bat --style=numbers --color=always {} | head -500" \ --preview-window "down:24:noborder" \ --color=dark \ --color=fg:-1,bg:-1,hl:#5fff87,fg+:-1,bg+:-1,hl+:#ffaf5f \ --color=info:#af87ff,prompt:#5fff87,pointer:#ff87d7,marker:#ff87d7,spinner:#ff87d7 \ --prompt="File > " You should check out the official
 fzfrepository for more examples and documentation. - The next bit is capturing the selection from
fzfin a buffer, which we do with:--query "$LBUFFER"as seen in the code. - And then, the below bits drive it home by asking Zsh to execute the string in the buffer like so:
Hereif [ -n "$selected_file" ]; then BUFFER="vi $selected_file" zle accept-line fi zle reset-promptzle, short for “Zsh line editor,” is a built-in utility for Zsh that we leverage to accept the input and reset if the user changes the mind. - One thing to note in the code is the
BUFFER="vi $selected_file"bit passes the selected file tovieditor — our editor of choice. You can swap that forcode, if you prefer VS Code, or even$EDITORif you want your default editor to take over. - Finally, we can create the ZSH widgets with the below code:
Note: I chose the functionszle -N psv zle -N pbvpsvandpbvto be named as such (declared previously) to represent a mnemonic, i.e: preview-side-vi and preview-bottom-view. - And bind the shortcut keys with this:
bindkey '^P' psv
bindkey '^O' pbv
If you want to dig deeper, please feel free to look under the hood in my dotfiles: https://github.com/raisedadead/dotfiles.
I hope you liked this story, until the next one.